Maintaining a clean and safe swimming pool often involves the use of a chlorine floater. However, when your chlorine floater starts sinking to the bottom, it can disrupt the chlorine distribution and potentially harm your pool. In this article, we will learn the reasons why a chlorine floater might sink, what to do when it happens, and preventive measures to keep your floater functioning properly.
Causes of Sinking
Understanding the reasons behind chlorine floater sinking is the first step toward preventing it. Here are some common causes:
1.Overloading the Floater
Adding too many chlorine tablets to the floater can make it too heavy to stay afloat. Chlorine floaters are designed to hold a specific number of tablets. Exceeding this limit can lead to sinking. Always follow the manufacturer’s recommendations for the number of tablets to use. Typically, a floater should not hold more than 1-3 tablets at a time, depending on its size.

2.Waterlogged Floater
Cracks or holes in the floater can allow water to seep in, causing it to sink. Continuous exposure to water and chlorine can degrade the material of the floater, leading to leaks. Regularly inspect your floater for any signs of damage, such as cracks or holes. If water gets inside, it can weigh the floater down, causing it to sink.
3.Old or Worn-Out Floater
Over time, floaters can lose their buoyancy due to wear and tear. The material can degrade, and the flotation mechanism can become less effective. If your floater is old or shows significant signs of wear, it may be time to replace it. Regular maintenance and timely replacement are crucial to prevent sinking.
4.Incorrect Assembly
Some floaters require proper assembly and adjustment to function correctly. Misaligned parts or incorrect settings can affect the floater’s ability to stay afloat. Ensure all parts are correctly assembled and the floater is adjusted according to the manufacturer’s instructions.
5.High Chlorine Tablet Density
Using denser or heavier chlorine tablets than recommended can cause sinking. Different types of tablets have varying densities, impacting the floater’s buoyancy. Ensure you are using the correct type and size of chlorine tablets recommended for your floater.
6.Temperature and Chemical Imbalance
Extremely cold water or an imbalance in pool chemicals can affect buoyancy. The density and buoyancy of the floater can be impacted by the pool’s water chemistry and temperature. Regular testing and adjustment of pool chemistry can help maintain optimal conditions for all pool equipment.
What to Do When Your Floater Sinks
If your chlorine floater becomes clogged, acting quickly can help restore its functionality. Here’s what you should do:
1. Immediate Actions
Remove the Floater: Carefully take the floater out of the pool to prevent further damage. Place it on a clean surface to inspect.
Inspect for Damage: Check the floater for cracks, holes, or any visible signs of wear. Use gloves to protect your hands from chlorine exposure.
2. Cleaning and Repair
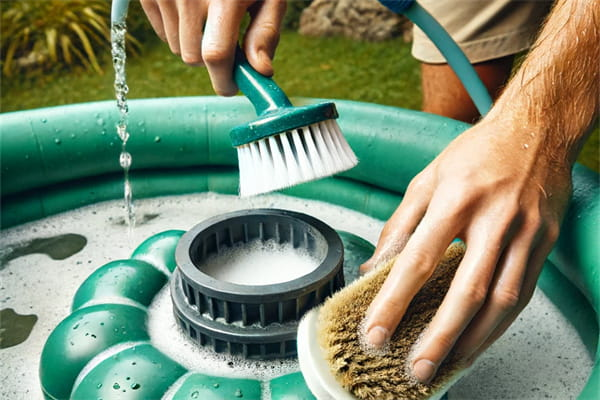
Rinse and Dry: Clean the floater thoroughly and let it dry completely. Use a garden hose to rinse out any debris or residue inside the floater. A strong water jet can help dislodge stuck particles.
Seal Cracks: Use waterproof sealant to repair any small cracks or holes. For stubborn residue, use a soft brush to scrub the inside of the floater. Avoid using abrasive materials that could damage the floater. If calcium deposits are present, soak the floater in a vinegar solution for several hours to dissolve the buildup.
Replace Damaged Parts: If the floater is severely damaged, consider replacing it entirely. Chlorine floaters can degrade over time due to constant exposure to chlorine and sunlight, losing their buoyancy. Replace old or worn-out floaters with new ones.
3. Adjust Tablet Quantity
Reduce the Number of Tablets: Follow the manufacturer’s guidelines for the number of tablets to avoid overloading.
Use Appropriate Tablets: Ensure you are using the correct type and size of chlorine tablets recommended for your floater. Replace old or degraded tablets with new ones.
Preventive Measures to Avoid Sinking
Prevention is the best strategy to keep your chlorine floater functioning optimally. Here are some preventive measures:
1. Regular Maintenance
Weekly Inspections: Check the floater regularly for signs of wear and tear. Make it a habit to clean your chlorine floater weekly to prevent buildup of debris and residue. Regular maintenance can extend the life of your floater.
Proper Cleaning: Rinse and clean the floater frequently to prevent buildup of residue that can affect buoyancy. Regularly check the level of chlorine tablets and replenish as needed. This helps maintain consistent chlorine levels and prevents the tablets from breaking down into smaller pieces that can cause clogs.

2. Correct Usage
Follow Guidelines: Adhere to the manufacturer’s instructions regarding the number of tablets and the assembly of the floater. Only place the recommended number of tablets in the floater to ensure proper water flow. Overfilling can restrict water movement and lead to clogs.
Monitor Chemical Levels: Maintain balanced pool chemistry to ensure the floater functions properly. Place the floater in an area of the pool with good water circulation. This helps distribute chlorine evenly and prevents the floater from becoming stuck.
3. Timely Replacement
Replace When Necessary: Do not wait for the floater to fail completely. Replace it when it shows significant signs of wear. Invest in high-quality floaters that are designed to withstand prolonged exposure to chlorine and pool conditions.
4. Seasonal Care
Store Properly in Off-Season: When not in use, store the floater in a dry, cool place to prevent deterioration. Make sure it is thoroughly dry before storage to avoid mold and mildew. Before the swimming season begins, inspect and clean the floater to ensure it is in good working condition.
